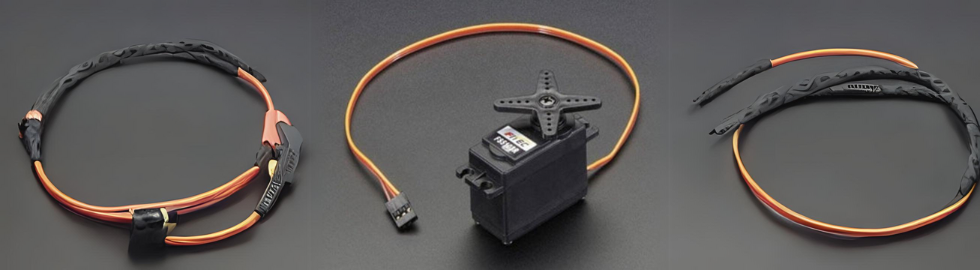
A servo is a small device that has an output shaft. You can connect small servo motors directly to an Arduino and control the shaft position very precisely by sending a coded signal to the servo.
As long as the coded signal is present in the input line, the servo maintains the angular position of the shaft. When the coded signal changes, the angular position of the shaft changes.
In practice, servo motors are used to control the position of objects, to rotate objects, to move the legs, arms or hands of robots, or to move sensors with high precision. Because servo motors are small and because they have integrated circuits to control their movement, they can be connected directly to an Arduino.
How does a servo work?
A servo has some control circuits and a potentiometer (a variable resistor, also called a poti) connected to the output shaft. This potentiometer allows the control circuit to monitor the current angle of the servo motor.
When the shaft is at the correct angle, the motor shuts off. If the circuitry determines that the angle is not correct, the motor is rotated in the correct direction until the angle is correct. The output shaft of the servo can move 180 degrees. Usually it is somewhere in the 210 degree range, but varies by manufacturer. With a normal servo, angular movement is controlled between 0 and 180 degrees. A normal servo cannot mechanically rotate any further because a mechanical stop is attached to the main output gear.
The amount of power applied to the motor is proportional to the distance it must travel. Therefore, if the shaft must rotate a large distance, the motor will run at full speed. If only a small amount needs to be turned, the motor runs slower. This is called proportional control.
How do you communicate the angle at which you want the servo to turn? The control wire is used to communicate the angle. The angle is determined by the duration of a pulse applied to the control wire. This is called pulse-coded modulation. The servo expects a pulse every 20 milliseconds (0.02 seconds). The length of the pulse determines how far the motor will turn. For example, if the pulse is 1.5 milliseconds long, the motor will rotate to the 90-degree position (often referred to as the neutral position). If the pulse is shorter than 1.5 ms, the motor rotates the shaft to 0 degrees. If the pulse is longer than 1.5 ms, the shaft rotates closer to 180 degrees.

As you can see in the figure, the duration of the pulse determines the angle of the output shaft (shown as a green circle with the arrow). Note that the times here are illustrative and the actual times depend on the manufacturer of the motor. However, the principle is the same.
Controlling the servo with an Arduino
In this experiment, we connect the power and ground pins directly to the Arduino 5 V and GND pins. The PWM input is connected to one of the digital output pins of the Arduino.
Connect the motor to the Arduino as shown in the following table:
- Red cable - 5 V pin Arduino.
- Brown/black cable - ground pin Arduino
- Yellow cable- PWM (10) pin Arduino

Arduino Servo Code
/*
Arduino Servo Test sketch
*/
#include <Servo.h>
Servo servoMain; // Define our Servo
void setup()
{
 servoMain.attach(10); // servo on digital pin 10
}
void loop()
{
 servoMain.write(45); // Turn Servo Left to 45 degrees
 delay(1000); // Wait 1 second
 servoMain.write(0); // Turn Servo Left to 0 degrees
 delay(1000); // Wait 1 second
 servoMain.write(90); // Turn Servo back to center position (90 degrees)
 delay(1000); // Wait 1 second
 servoMain.write(135); // Turn Servo Right to 135 degrees
 delay(1000); // Wait 1 second
 servoMain.write(180); // Turn Servo Right to 180 degrees
 delay(1000); // Wait 1 second
 servoMain.write(90); // Turn Servo back to center position (90 degrees)
 delay(1000); // Wait 1 second
}